Campervan Conversion Lining and Insulation (Updated March 2026) Insulation is an important factor, I'm using a mixture of PIR sheet, Mineral Wool and Dodo Thermal Liner Pro, which ever best suits the location, as no one type suits all. 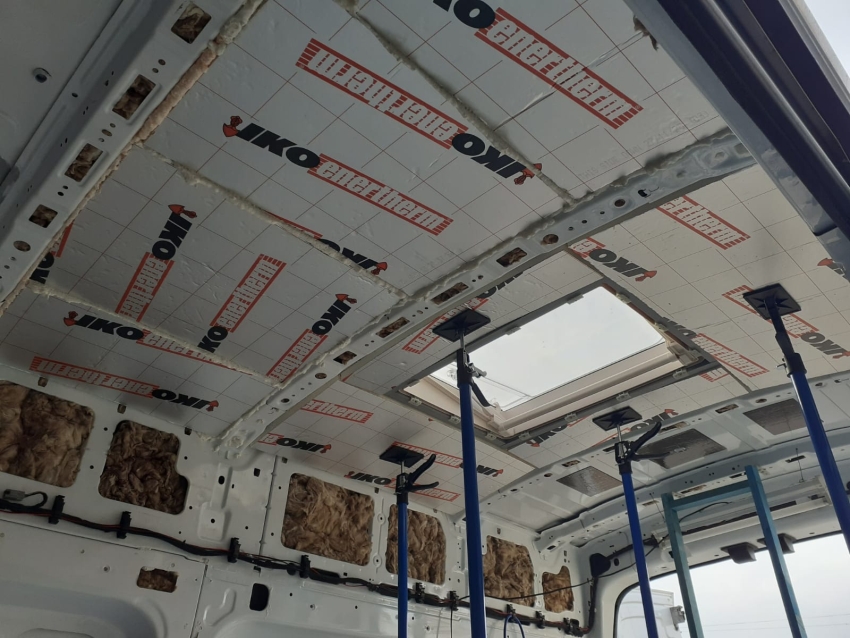 I tiled the ceiling with 25mm PIR sheet and filled the gaps between pieces with PU foam. 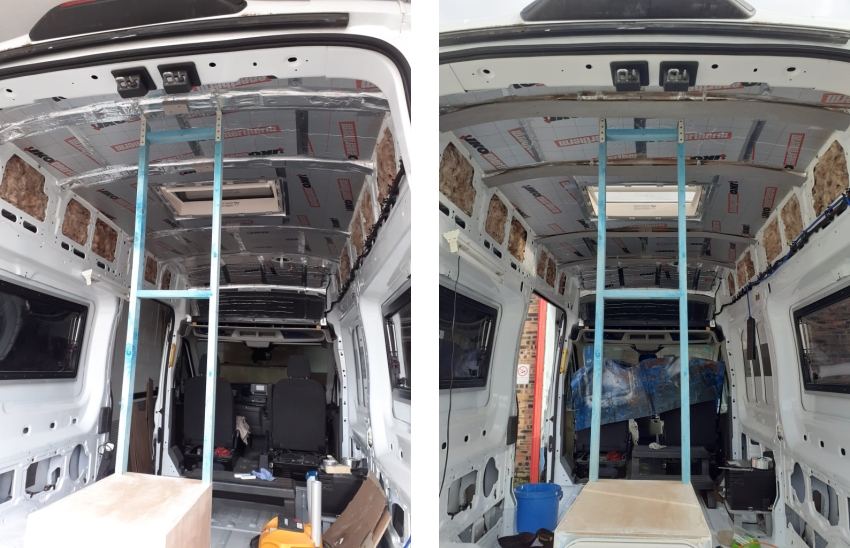 The surplus foam was trimmed with a hacksaw blade and the joints covered with Aluminium tape. The top pockets in the side walls were lightly stuffed with Mineral Wool and the front slope above the Cab was covered in 10mm Dodo. The five cross beams on the roof are a fairly irregular shape.These were filled with Mineral Wool, taped, then a 100mm strip of painted 5mm ply was bent across each. I used spacers to hold the required shape and screwed it all into position. These strips give a uniform, flat section in the middle and run out with an even curve at the sides. The plastic ceiling lats will be glued to these strips with Sikaflex. I started laying the ceiling lats, hollow plastic soffit board, which is super light weight. With the minimal support structure I used and PIR insulation sheets, there's not much weight up top. 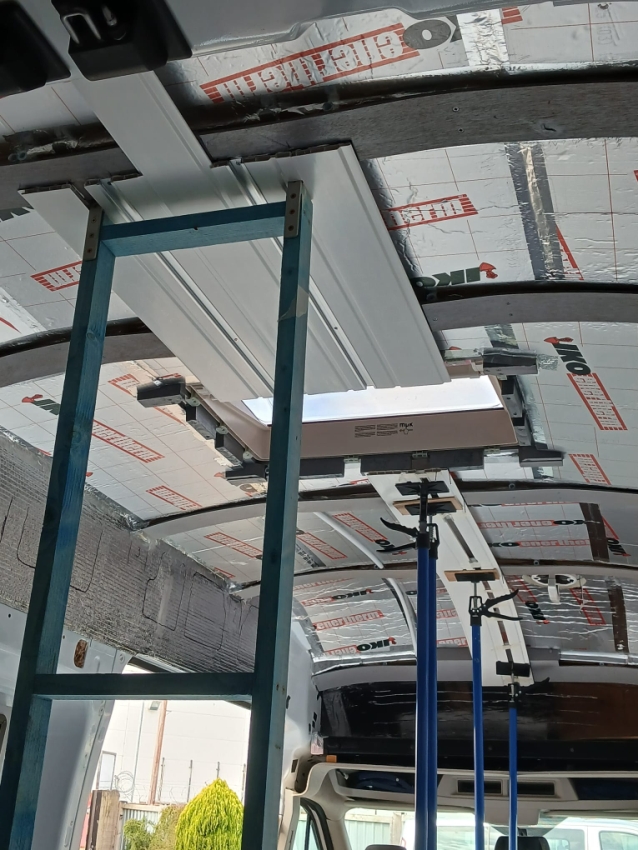 The embedded LED track is installed at the same time, I had to make several cuts in its spine to allow it to form the curve at the front of the vans roof. The plastic boards are only 100mm wide x 9mm thick and hollow, apart from four bracing ribs. These bend fairly easily and is the reason I chose them over the 300mm wide variant. They will also adopt the curve either side of the roof more easily. Soffit boards from eurocell. To be continued.............. |
 |
 |