Okto Research DAC
Oct 2020
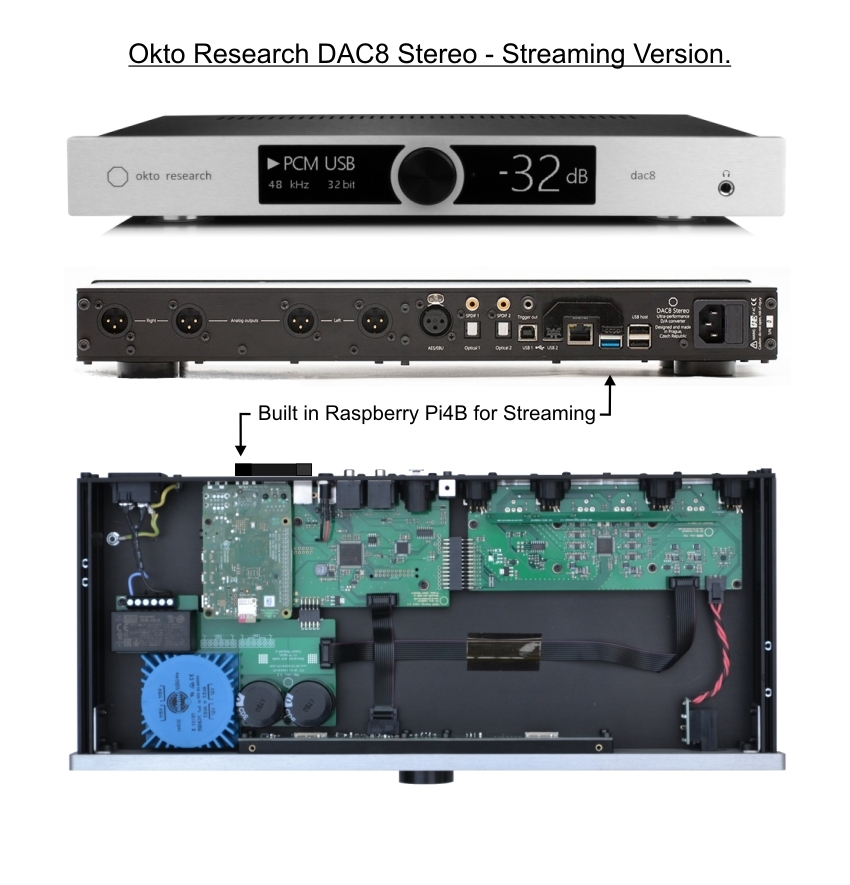 This is my Okto DAC8 Stereo - Streamer. It's a high Quality DAC with a built in Raspberry Pi 4B for streaming. I had a Topping D90 prior to this, a very good DAC in its own right, both in terms of measurements and in its subjective sound quality. I used this with a stand alone RPi4B to great effect, so why change? The Okto measures slightly better and the built in RPi/PSU makes for fewer boxes on the shelf. It has a large clear display, nice styling and importantly for me, a customer specified output option. Most modern DAC's have a full scale output of 4 to 4.5v RMS (balanced) and use a digital volume control, to act more like a digital Pre Amp. This is fine if your sources are only digital, but leads to a big imbalance in output if you also have analogue sources, like a Turntable/Phono Stage, working at line level. So I specified 2v RMS balanced output for my unit. I set the digital volume control to maximum, bypassing it and the display shows 0dB. This level of output is a much better match for my Balanced Phono stage. Not withstanding variations in track levels, my digital and analogue sources now give approximately the same output level. The volume is controlled by my Pre Amp. Sound wise, there is not much in it, the Okto/Topping both give excellent levels of detail, good bass depth and a very Black background. In my set up, the Okto just noses ahead, it's a very slightly smoother/softer sound, so is a bit more forgiving of bright, or harsh recordings. It's a very easy listen, sounding totally effortless, it just disappears. The Okto Streaming version comes with a RPi4B, having 1or 2GB of RAM, depending on availability at the time of build. The stand alone RPi I had been using with the Topping has 4GB of RAM and I had installed heat sinks on this unit, so I installed this into the Okto. 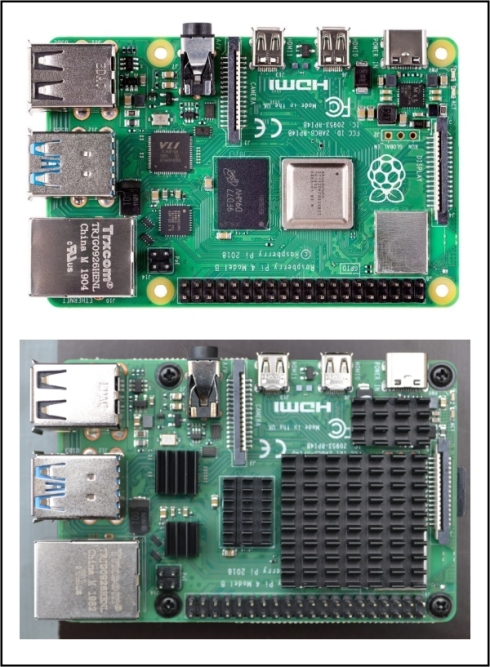 The top image is the standard RPi 4B and the lower one is after I applied the heat sinks. I don't think the self adhesive foam strips, that are used on many of these heat sinks, gives a very efficient heat transfer, so I glued them in place, using a thermally conductive adhesive, designed specifically for gluing heat sinks together. It has a high adhesion level, good thermal conductivity and a working temperature of 180 deg C. The Streaming function of the DAC is meant to be used "Headless" so no monitor/mouse etc. The unit is used as part of your home network and accessed via any networked device with a browser, so using your Phone or Tablet etc. There is a big downside to this, if you take your unit to a hifi meeting or someone else's house, it won't function, as the network is not available. Even if you plug a USB stick of music into the unit, you can't play it, as the Headless operation requires the network to be in place. I also like to display my music library on my large screen TV via the RPi HDMI output and control it using a wifi "Air Mouse". I think its a mistake not to have exported the RPi's HDMI output to the rear panel of the unit, were you could easily plug in a monitor. So, how do I modify my unit, to access the HDMI output? The RPi4B uses Micro HDMI connectors, most monitors/TV's use full size HDMI. There are not many Micro to HDMI adaptor leads around, even fewer, short enough for this application and I couldn't find a single one for panel mounting at the right length. So I had to make one. 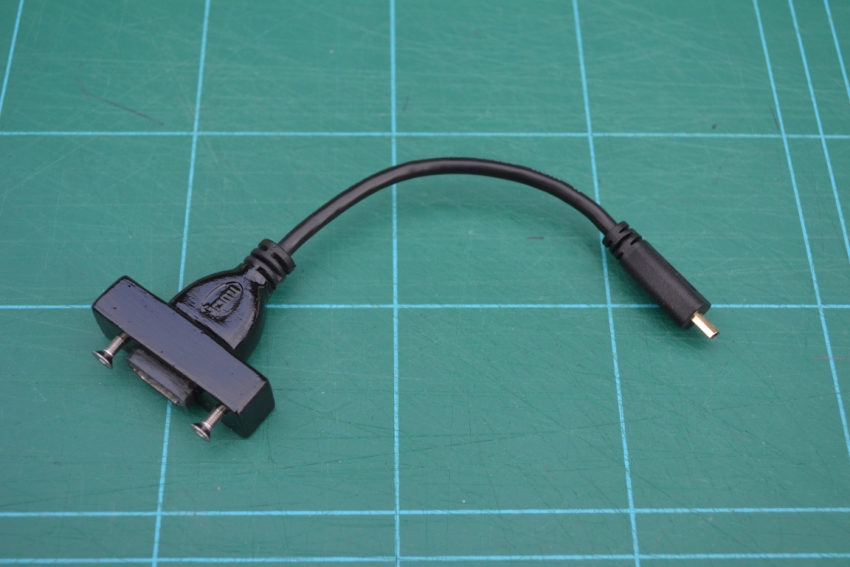 This is what I made. I took a 150mm long Micro HDMI Male to HDMI Female connector lead and cast a block of JB Weld, a filled epoxy, around the HDMI connector body. I drilled and tapped it M3. The flexible jacket on the connector had a moulded groove around it, which I enlarged with a hot soldering iron. The JB Weld flowed into this groove, making a robust fixing. 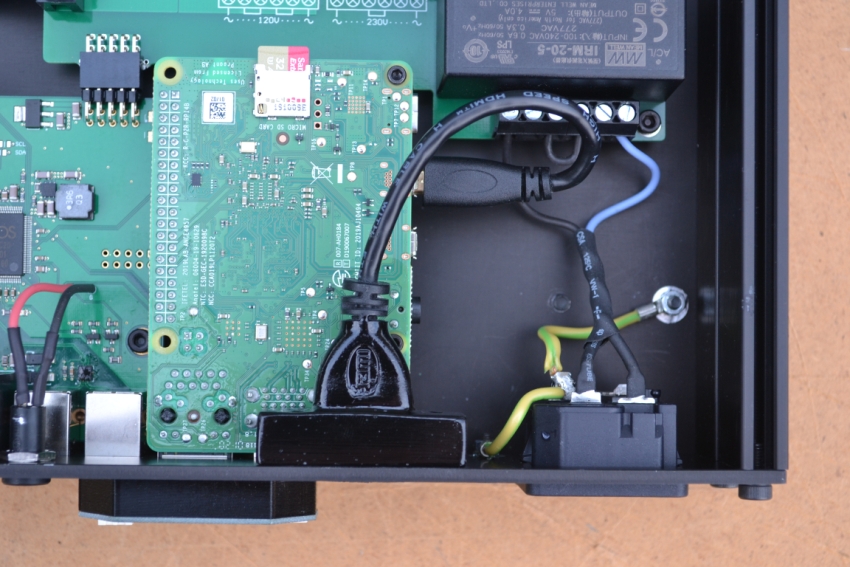 This is the connector in position. 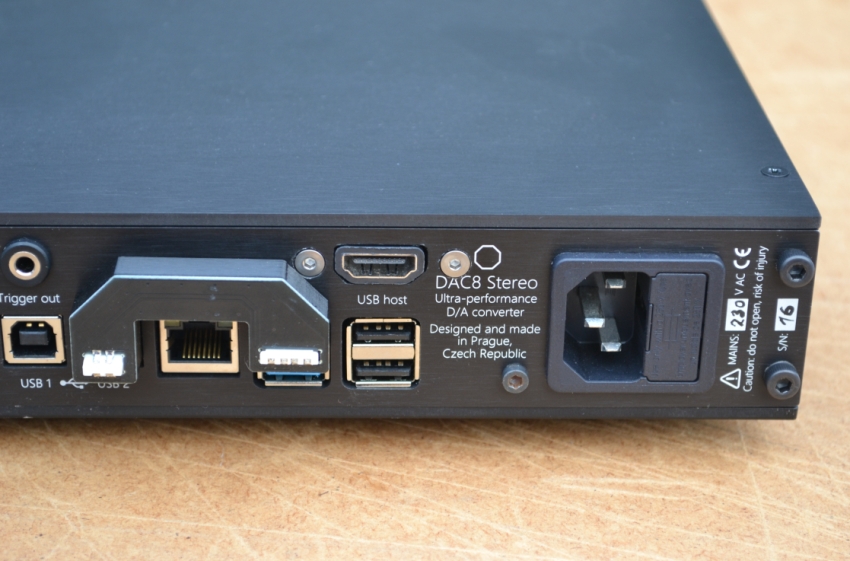 I centred the new sockets position with the RPi's USB2 sockets and used CSK screws so as not to foul the Streamers USB output/input jumper strap. I removed the back panel to make the cut out and screw holes. There are lots of screws to remove, the mains leads, and earth wires can be unscrewed, but you have to de-solder the 12v trigger wires from the back of the socket. There is plenty of access room to do this and I re-applied some heat shrink to the re-soldered joints, so it looks good as new. I now have my NAS library displayed on my TV via the MoOde music player software I installed on the RPi. My unit 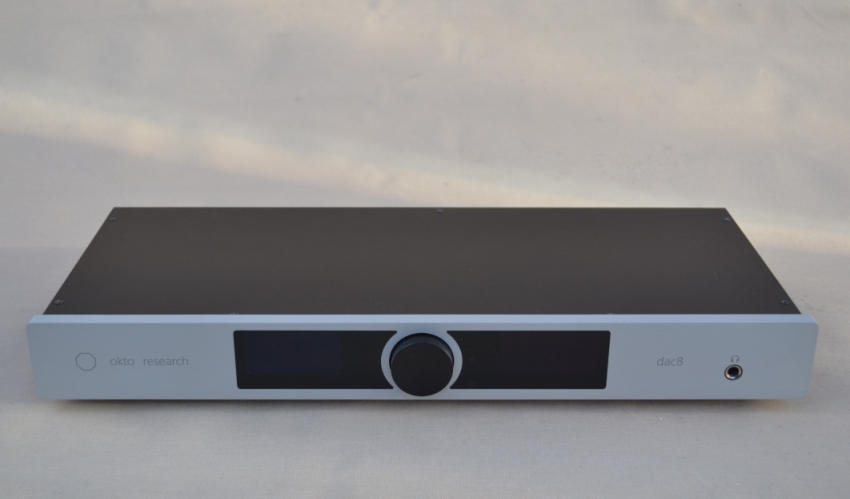 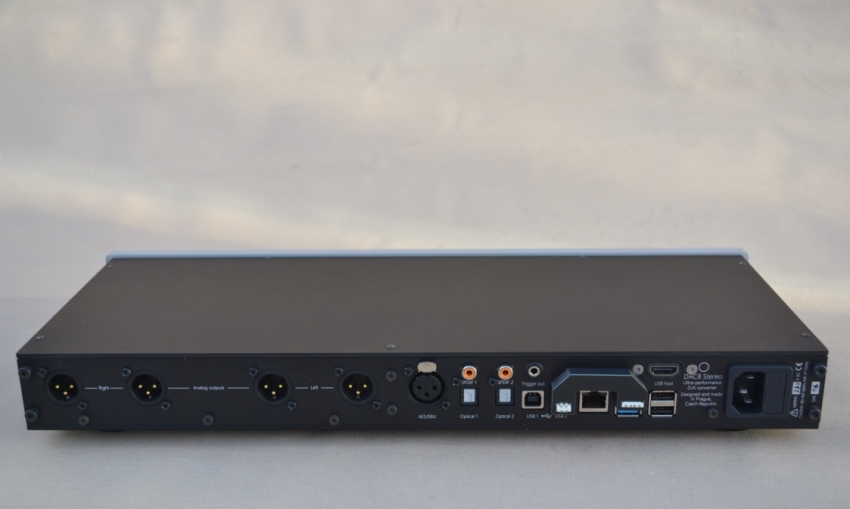   |
 |
 |